Contact Us
Every issue of Hello, Darling magazine features play ideas for kids. In the Fall 2014 issue we featured kitchen play ideas for the different ages and stages.
KITCHEN SHAPES
A fun way to play with interesting shapes!
Materials: 5-10 kitchen tools, stiff paper (an office folder or cardstock), marker
What to Do: Gather kitchen items and trace their outline onto the paper. Place the items you traced on the floor and help your little one match the item to the drawn outline.
Hint: Start with a few simple shapes like cookie cutters, large spoons and measuring cups. Add a new shape to the same paper each day until it is filled.
Variations: Include an item that wasn’t traced. Or put all the items into a paper bag for added fun.
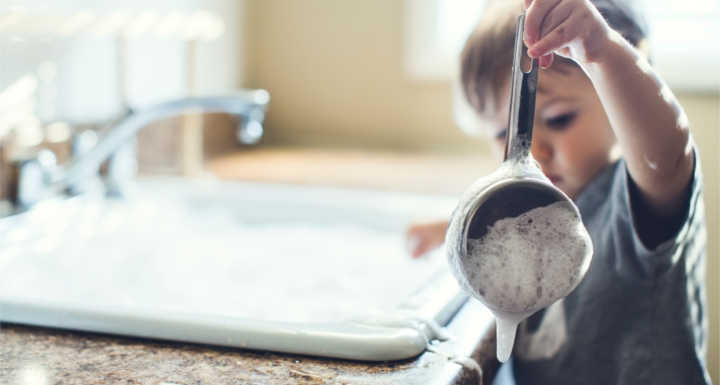
Sink Soup
(Mostly) tidy sensory and pretend play!
Materials: Various water-safe kitchen items, including some items that float, sink full of water, apron or towel
What to Do: Ask kidlet if they want to make soup, fill clean-ish sink with water, set kitchen items to side of sink.
Hint: Start with just a few items in the sink (pot, spoon, etc), then add to that. Chat with your child about what kind of soup they are making.
Variations: Add dish soap partway through. Especially fun with a whisk. Offer veggie scraps from your dinner prep, too!
Master Chef
Get ‘em eating and making salad young!
Materials: Lettuce, cut-up veggies and add-ins, salad spinner (optional), tongs
What to Do: Wash lettuce (in spinner if you have one), then have ‘chef’ tear lettuce leafs into bite-sized pieces. Let child make salad from provided prepped veggies. Toss with tongs. Serve with dinner by proud kid!
Hint: Use grated carrots, diced cucumbers, sliced olives, shredded cheese, cherry tomatoes and croutons for add-ins. Don’t forget to wash hands before you start!
Variations: Use clean kid-safe scissors for cutting up the lettuce. You can also alter this to be a fruit salad and let your chef use a kid-safe knife or dull butter knife to chop bananas, kiwi, etc.
Home-Style Butter
Old-fashioned (yummy) fun!
Materials: Small jar with a secure-fitting lid, heavy whipping cream, wiggly kid
What to Do: Add heavy cream to a small jar (baby food jars work great). Fill about way. Secure lid. Double check the lid is secure. Shake. Shake some more. Hand jar off to wiggly kid(s) to shake. When a solid lump emerges (about 15-20 minutes, depending on shaking skills), pour off the liquid (buttermilk), refrigerate the lump to harden (optional), and serve on bread.
Hint: Add a marble to the jar to hasten the results. You can use a plastic jar as well.
Variation: In the “old days,” they would add a little juice from a grated carrot to the butter lump to color it.