Contact Us
I love this activity, and it’s been field-tested by many museum-going school-aged and adult children alike. It’s so much fun to watch people engage with dry ice in this manner. Most people are familiar with what happens to solid carbon dioxide when warm water is added (“smoke”), but for many, the addition of soap takes the fun next-level.
Target age groups: Toddler – 5th grade
Duration: Set up – 15 minutes, Play – 20-60 minutes (or more depending on how much dry ice and warm water you have!)
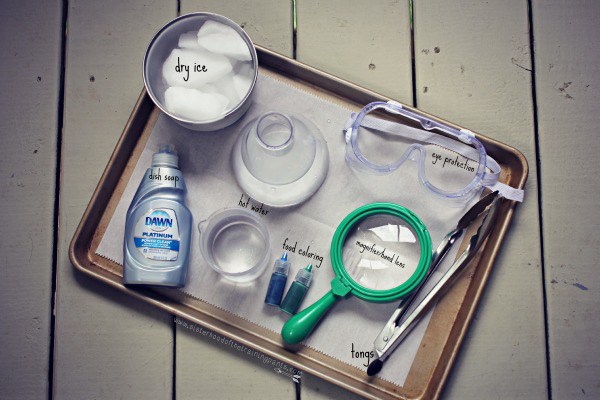
Supplies:
- Liquid Dish Soap
- Containers of warm water (I used a plastic flask and a plastic beaker)
- Food coloring
- Safety goggles
- Tongs
- Hand lens/magnifier (optional)
- Oven mitt or rubber gloves (recommended if you or the kid in your life is at risk of directly touching the dry ice)
- Dry ice in a temperature-safe bowl or cooler
- Cookie sheet or container
- Not pictured: hammer or mallet to break-up dry ice into usable chunks
If you find yourself with some extra dry ice, or you are just looking for something really fun to do with toddler thru upper elementary school students, then you will want to try this activity. It’s sure to appeal to the aspiring chemist in your child! (I had dry ice because my awesome friends sent food to help me cope with the anguish of colic. The food arrived in Styrofoam coolers, and I was delighted to find dry ice inside. I made sure it didn’t go to waste!) If you don’t have dry ice on-hand, you can purchase a block of dry ice at your grocery store. The cooler is usually in the front of the store by the regular ice. It usually costs anywhere from $5.00-$8.00 per pound.
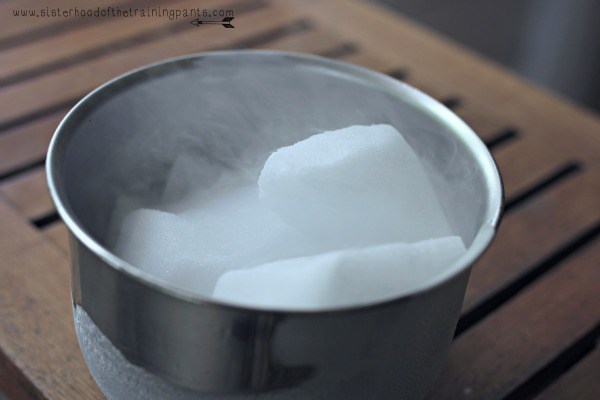
REQUISITE WARNINGS AND CAUTIONS: If you aren’t comfortable handling dry ice with tongs, you will want to wear rubber gloves or an oven mitt. Dry ice can burn your skin through prolonged exposure (think: frostbite), so be sure to CONSCIOUSLY SUPERVISE YOUNG CHILDREN around dry ice and provide plenty of warnings about the dangers of dry ice and bare skin. Also, be sure to perform this activity in a well-ventilated area. (It’s highly unlikely with the quantity you would be using, but too much carbon dioxide gas can be problematic to your health. But, I have to put the warning out there.) It’s always a good idea to wear eye protection as well. Dry ice produces the best results when mixed with warm or hot water, so be sure to supervise those efforts very carefully as well. Boiling water is not necessary. I used hot-out-of-the-tap water (which you will need to replenish as the dry ice absorbs the heat energy of the water).
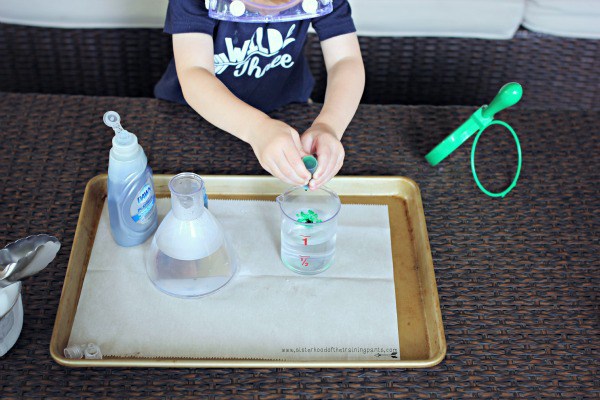
Add food coloring to warm water. Have your child place their hands on the outside of the container (if it isn’t too hot) and state an observation. “What does it feel like?” “Is it warm or cold?”
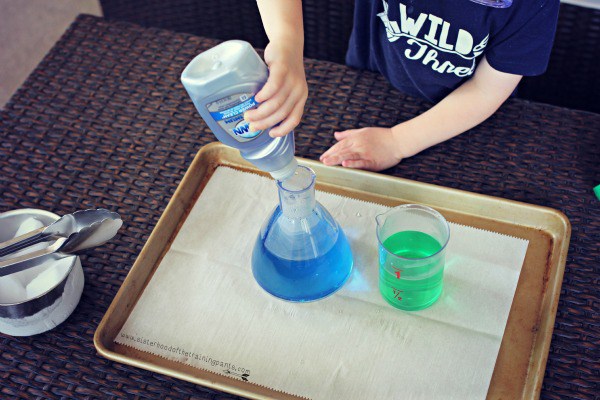
Add soap to your ONE container of warm, food-colored water.
You can blow on the dry ice and your warm breath will speed up the process of going from a solid to a gas (creating “smoke”). Ask your child to place their hand near the smoke as you blow or hover their hand just over the ice. Ask, “What do you observe? Is the ice hot or cold?”
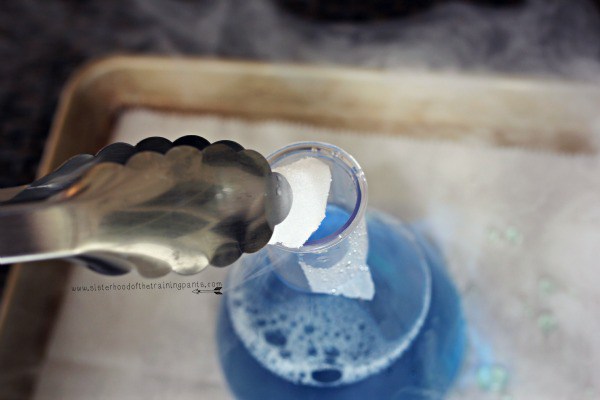
Using tongs or gloved hands, carefully drop a few chunks of dry ice into your containers of warm water. Before you release the dry ice, ask your child “What do you think will happen when I put this cold chunk of dry ice into the warm water?” These sorts of inquiry-based observations have scientific method written all over them, and I just can’t get enough of that in my or my toddler’s life!
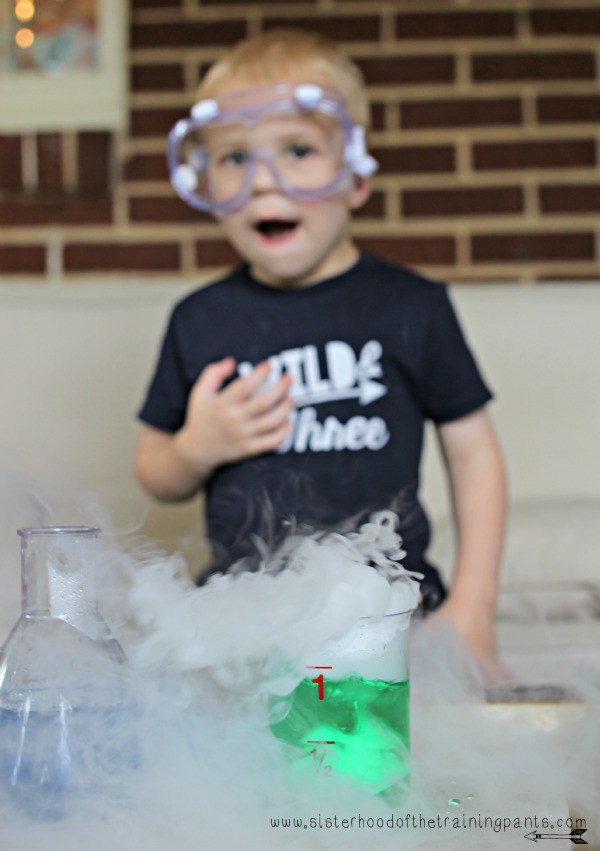
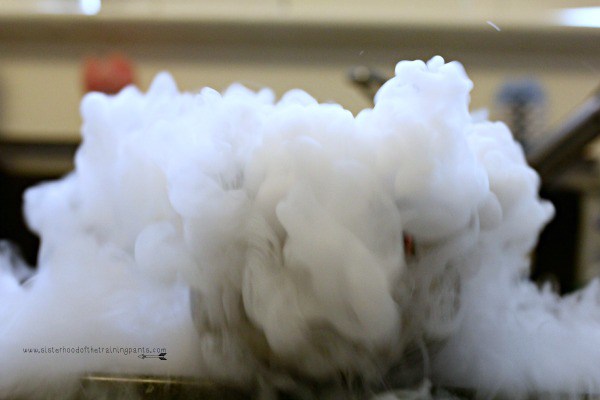
This guy loved seeing the “smoke,” as he called it. “It’s magic,” he proclaimed. The chunks of dry ice appear to boil in the warm water, and fog is released as the dry ice absorbs the heat energy from the water and sublimates from a solid into a gas. My toddler thought this was awesome, and I made sure to ask “What do you observe?” “What do you think is happening to the dry ice?”
Now it’s time to play and discover and learn!
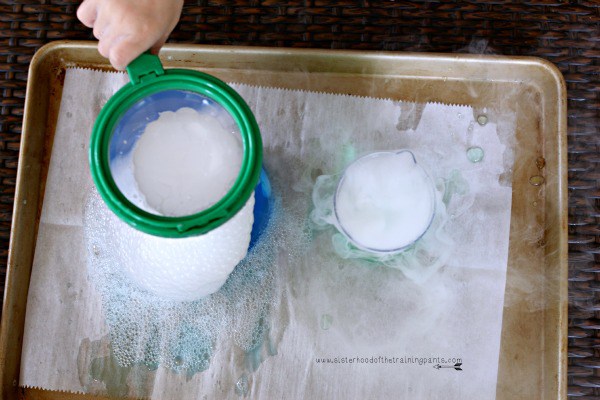
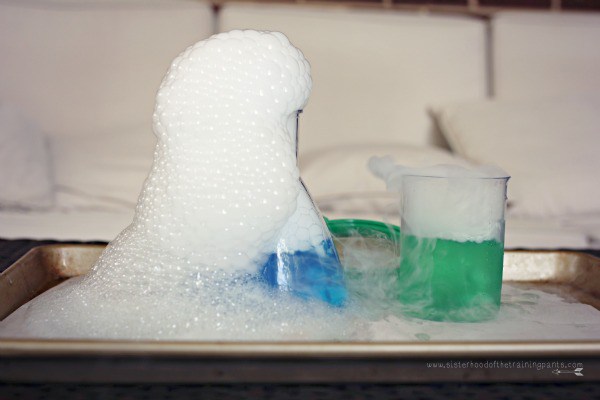
Beaker with no soap. “Fog” only.
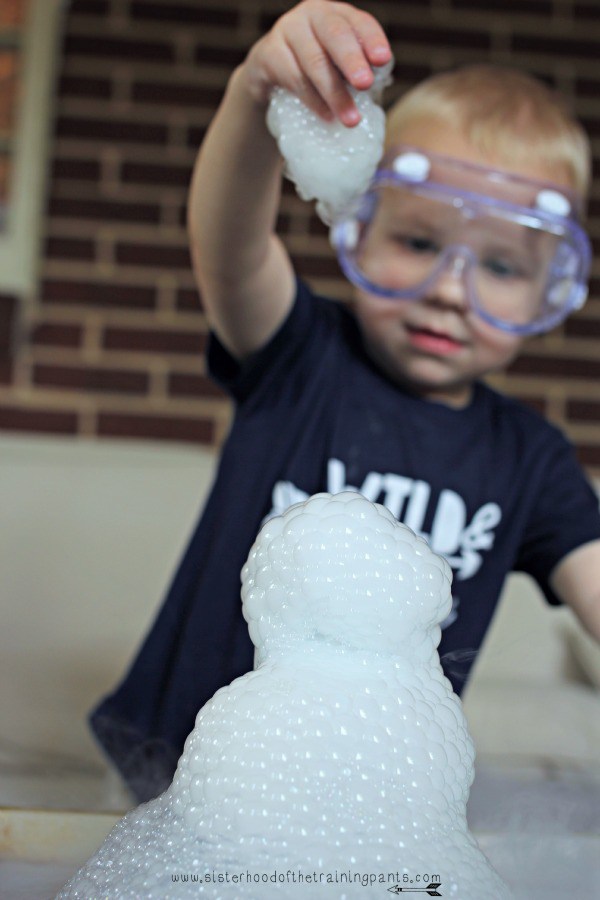
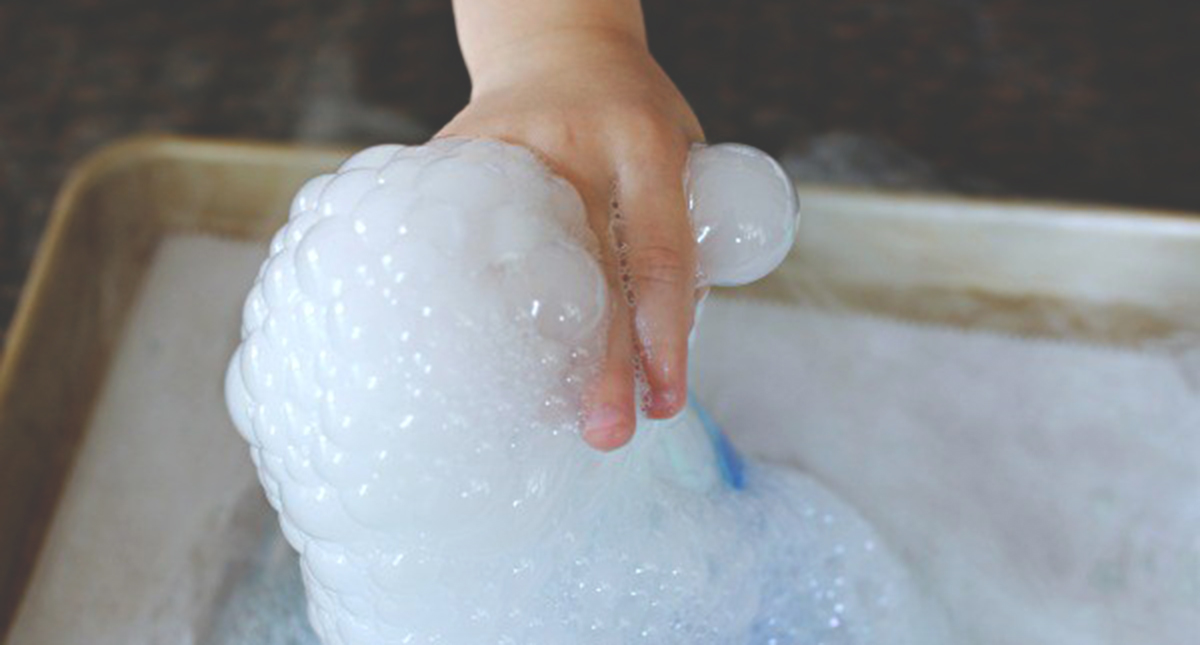
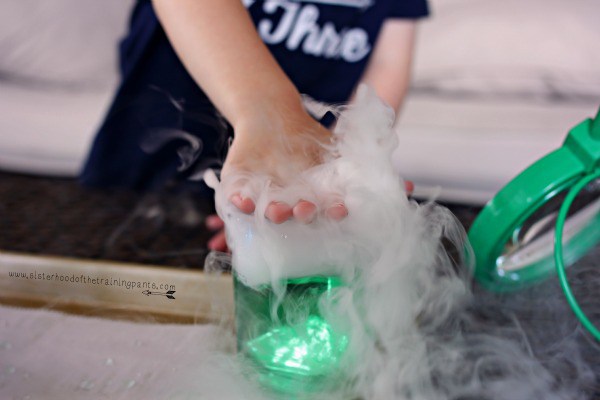
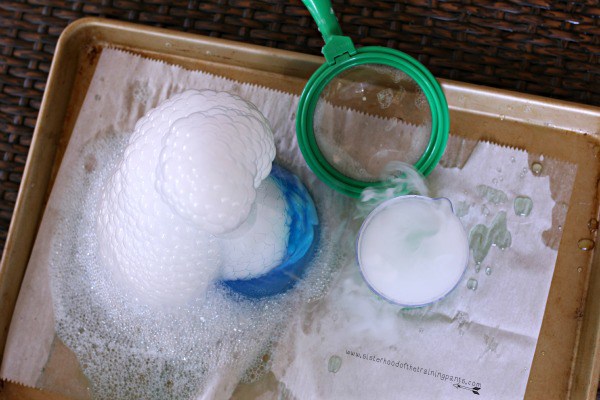
Flask with soap added. “Fog” bubbles when popped!
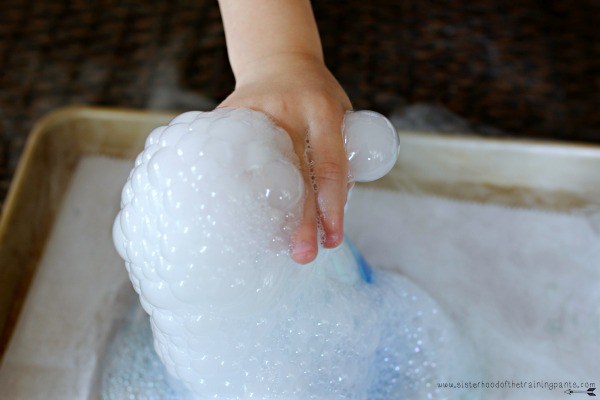
My toddler loved popping the soap bubbles and helping the gas escape!
Time for a closer look! Get me my hand lens!
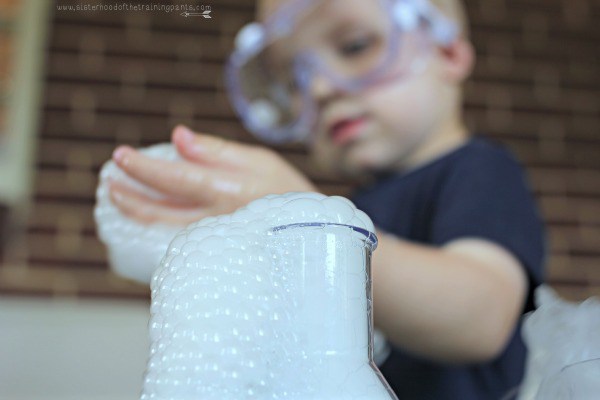
Holding bubbles and clapping hands made for a cool effect.
Science is fun, and it’s never too early for inquiry-based learning!
Extension and Science behind the fun:
Before you finish your activity, be sure to observe what happens when you add hot water directly to the temperature-safe container of dry ice!
Why do I love dry ice? Dry ice is a very cool (no pun intended) substance that is technically simultaneously a solid liquid gas. Plus, I love that you can get your hands on it quite readily (as opposed to liquid nitrogen or liquid helium). To somewhat oversimplify the science: if you think of water – solid water is ice, it melts into liquid water, and then it can change into a gas form of steam when heat energy is applied? Water evaporates. Dry ice doesn’t evaporate. Rather, dry ice is a rare piece of MATTER and it sublimates – it goes from a solid into a gas. Essentially, the air is boiling the dry ice. How cool is that?
Carbon dioxide as a gas is heavier than the air we breathe, so when warm water is added, it speeds up the sublimation process (heat energy is awesome!!). What you observe is a fog or smoke effect that is highly sought to enhance Halloween parties and music videos alike. You can see in the photo below that the fog is rising above the lip of the bowl and then falling rather than floating into the air. You can observe coolness in temperature if you place your hand over or (carefully) inside the “fog.” (Think: heat rises, cool “air” sinks).
If you are interested in extending this to older children (or even want to go next-level with your toddler), you can compare and contrast what happens with water ice when added to warm containers of soapy water. Prompt your child to compare the reactions of what happens when dry ice is added to warm water without soap and water ice is added to warm water without soap. Do the same for warm water with soap added.
You can also have your child discuss what happens to the speed at which dry ice sublimates at room temperature (sitting in a bowl or Pyrex) and what happens to sublimation speed when dry ice is placed in warm water.
I think the key here with any aspect of this activity is having your child make PREDICTIONS, ask QUESTIONS, and make OBSERVATIONS to formulate CONCLUSIONS based on the aforementioned parts of the scientific method. Even the tiniest scientist is capable to making brilliant assessments of inquiry!
This was originally posted by Sarah Caughton on her blog, The Sisterhood of the Training Pants. If you liked what you read, you can look around the Camp Mom section of her blog for some more fun, budget-friendly ideas for the kids in your life! Before becoming a mama, Sarah worked in informal education as a park ranger and museum educator, so she has lots of great ideas. She is also insightful and hilarious about all things parenting and you can read more here.